


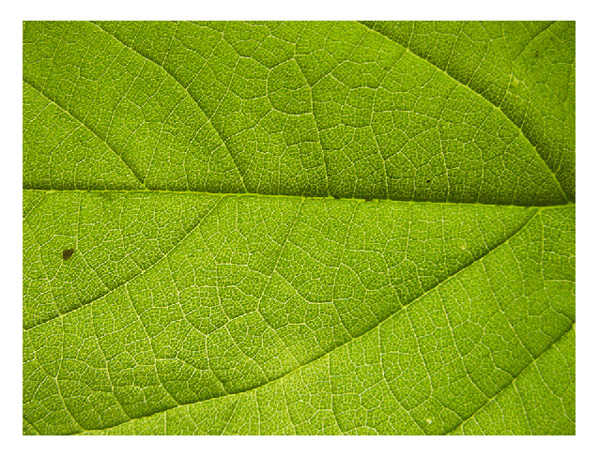
Step 1
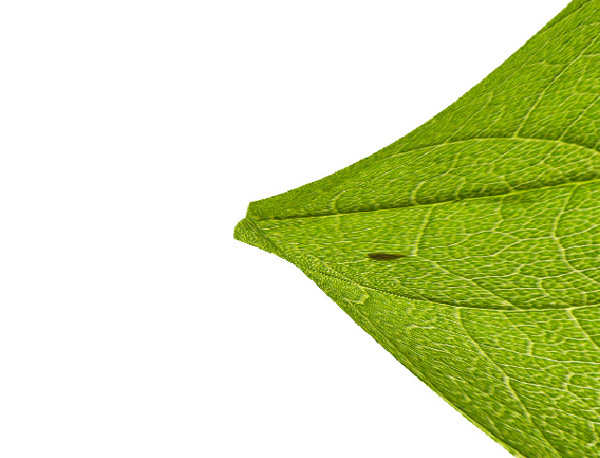
To begin, you'll need to find a photograph texture of a leaf. I have chosen this one from lostandtaken.com by a a photographer named Caleb Kimbrough.
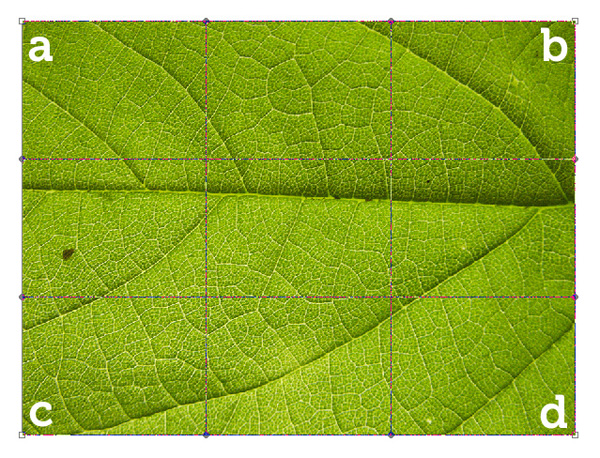
Step 2
Load your new found texture into a new project. With the Rectangular Marquee Tool (M) selected, Right-click on your layer in the artboard and select Free Transform. Once you have done that right-click on the texture again and select Warp. I have labeled each corner respectively as we will be moving them around quite a bit.
Step 3
Now that you have your layer in Warp mode, click and drag the corner (a) down 1/3 of your grid.

Step 4
Now click and drag the corner (point c) up 1/3 of your grid. Already our leaf is beginning to take on it's natural form.

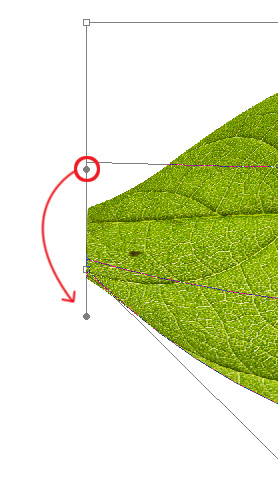
Step 5
Each corner has 2 arms that you can move in order to manipulate your layer even further. Pull the corner's (point a) left arm down as shown below.
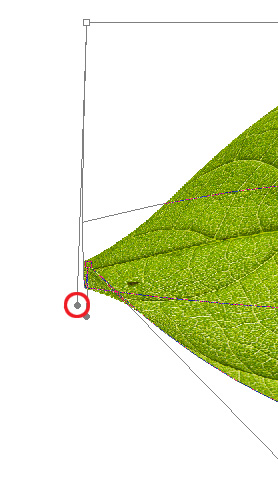
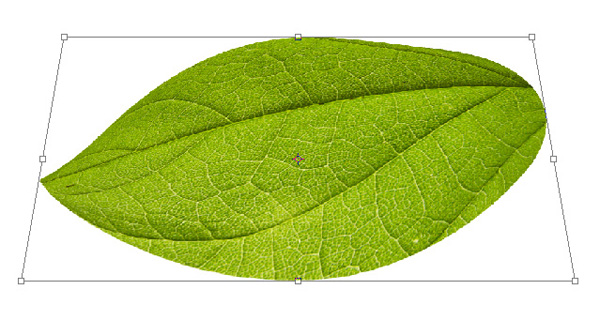
Step 6
You should give a sharper edge to your leaf. Something like this. Press Enter to finalize the Warp.
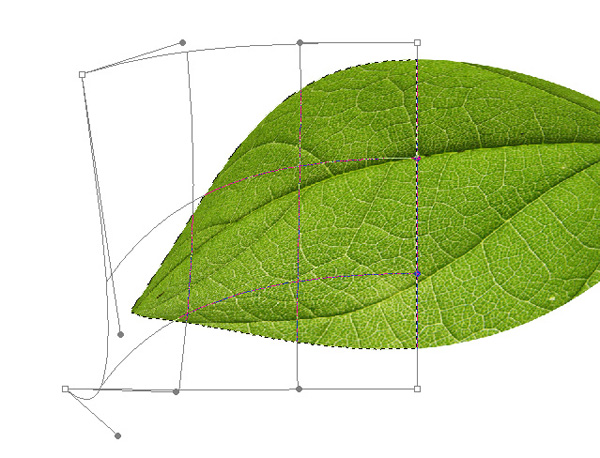
Step 7
You should have a sharp point on your leaf after the last several steps. However, your point may be a bit bent due to the Warp Tool curling. Fix this by using the Polygonal Laso Tool (L), selecting the excess curl and pressing the Delete key.

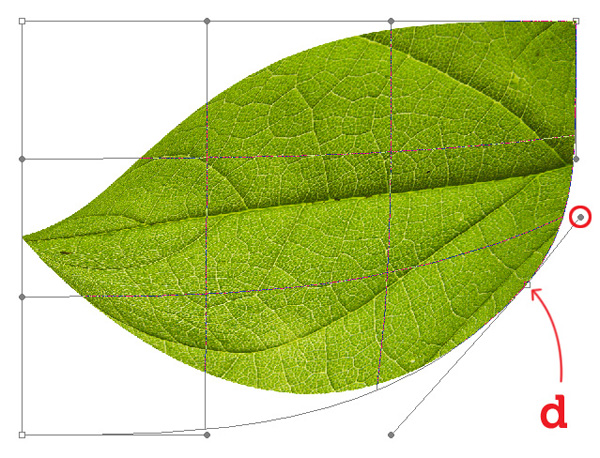
Step 8
Now lets focus on the other end of the leaf. Use the Warp Tool again (see Step 2) and drag point d as shown in the picture below. You'll want to get both of the arms of point d to be parallel.
Step 9
Now do the same with the top-right corner (point b). Also, if you want you can tweak the leaf into whatever position you require by holding your mouse down and dragging the inner grid, as well as the other points.

Step 10
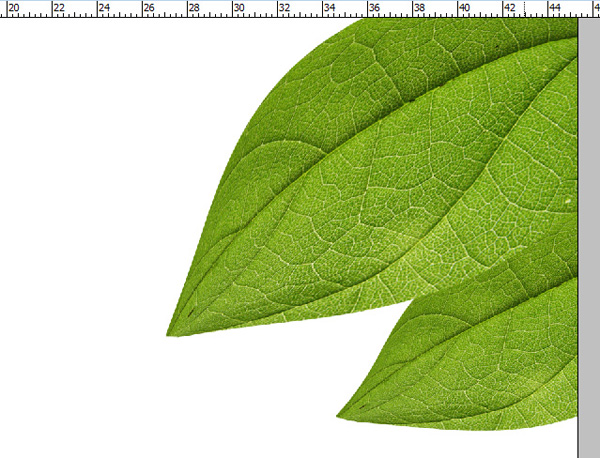
To add a bit of additional perspective Right-click on your leaf and select Free Transform. Now hold Alt + Shift and drag the top-right corner, then move it left a bit. This will give the leaf a bit of distance perspective.
Step 11
If you want to make the leaf drop at its point, use the Rectangular Marquee Tool (M) and select only the left half of the leaf. Then proceed to Free Transform > Warp. This will allow you to move that half of the leaf without warping the right half. Make sure not to move the points that are in contact with the leaf that is not selected as this will cause a tear between the two pieces.
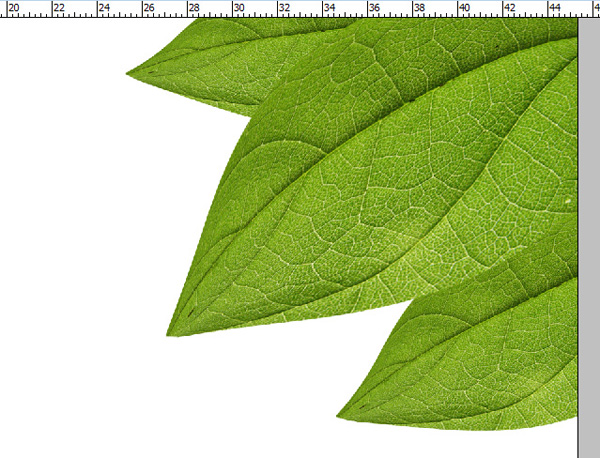
Step 12
Next, duplicate the layer with your leaf on it, drag that layer below your original leaf layer. Warp it a little to show some discrepancy. Repeat this process as many times as your desire. Play with it and have fun.
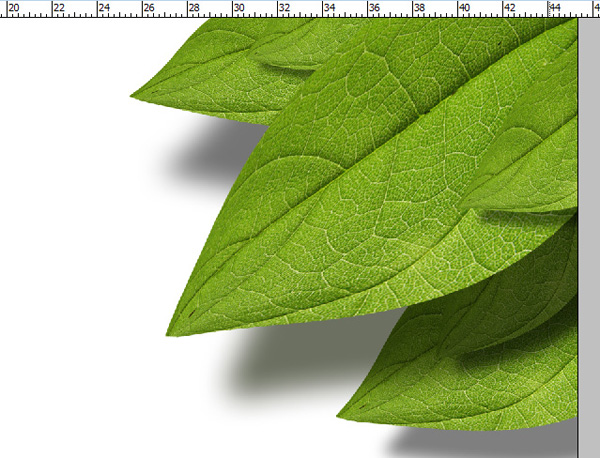
Step 13
On each layer you can add a simple drop shadow by double-clicking on the layer and checking the box labelled Drop Shadow. To give leaves even more depth, make sure you adjust the Distance, Size, and Opacity accordingly. The larger leaf has an Opacity of 63%, a Distance of 299px, and a Size of 84px (this is on an artboard sized at 2590px by 1943px at 72px per inch). If you have a leaf that is directly on top of another, you will want to have the distance significantly lower, as well as the size. It should be more sharp and distinct.
Step 14
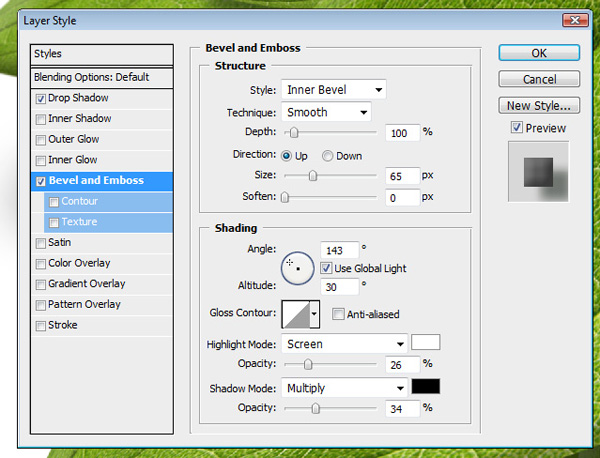
Next I added a quick and easy Bevel and Emboss. It is often frowned upon to use this but it gets the job done quick. You can paint the sunlight hitting the leaf if you desire, but this is only an intermediate tutorial.
Double-click on the desired layer and check the box Bevel and Emboss. Change your Depth to 100%, Size to 65px, and Soften to 0px. Also you may want to lower the Opacity of the Highlight Mode as well as the Shadow Mode.
Step 15
You may want to add some depth of field. To do this I recommend you use a simple Gaussian Blur. Select the leaf that is below the rest of them. Right-click on the layer in the Layer Window and select Convert to Smart Object. Now select Filter > Blur > Gaussian Blur and set it to 2.6 pixels.
A Smart Object will allow you to change the settings of your applied filters non-destructively. If you are really thoughtful, you could do this with the Drop Shadow and the Bevel and Emboss on the leaves...repeat this process with the other leaves, but lower the blur as the leaves get closer to the largest leaf. We want that to be the focus.
You can also use the paint brush to mask the Smart Filter on the Smart Object. If you select the Smart Filter on your Smart Object layer, select the color black and paint on the artboard with the Paintbrush Tool. You will find that it removes the Gaussian Blur (or any other filter you applied to your Smart Object) in the area that you paint black. I did this with the largest leaf and left only the edges slightly blurred.
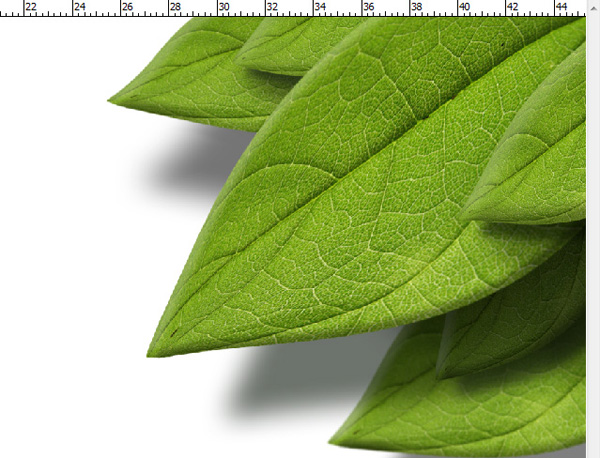
Final Image
There you have it. A quick and easy display of greenery. You can really play around with this and do a lot of different types of leaves and positioning. I hope you've enjoyed this tutorial. Half the fun is just messing around with the Warp tool. The final image is below.

Source:psd.tutsplus.com

