


As you may have noticed, the bevel option is very very cool, as it lets you make a pasted object more realistic, though it is more obvious when it is set with a background, so the depth cue is more obvious.When you buy Photoshop, you discover you have many layer styles that are pretty useless, according to me they are just included so you get to learn how they work.
Now we'll learn how to texturize an object:
Prepare the pic, and create a new blank layer on top of the yoghurt(CTRL+SHIFT+N). Press (T) and type a big "PSC" , and use the warp text button shown:
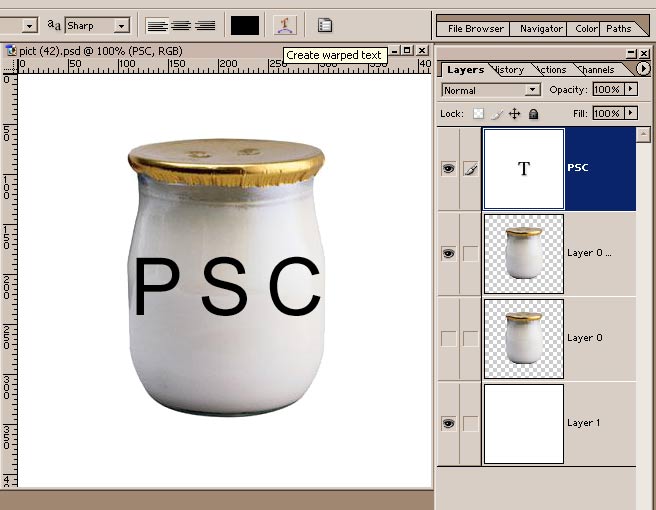
to warp the text with "bulge", so it fits the yoghurt.Rasterize the text layer, and CTRL+T to add perspective and distort it.Then CTRL+CLICK the yoghurt layer so you load its transparency map as a selection on the text layer, press CTRL+SHIFT+X to enter "liquify", use the "bloat brush"(B) to stretch the text, press enter,CTRL+D to deselect, and CTRL+T to transform it so it fits the glass perfectly, so you get something like this:
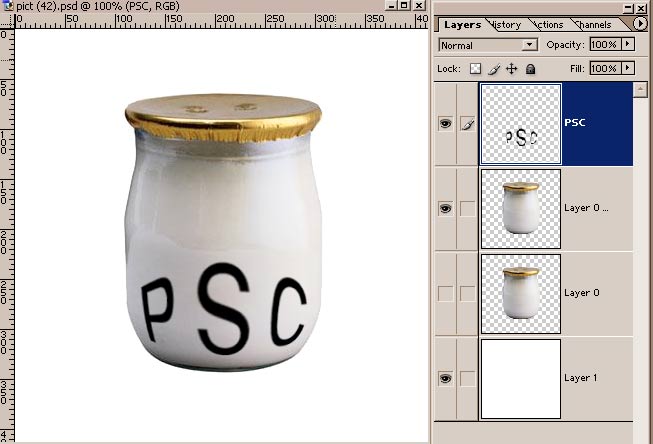
Now select the yoghurt layer, and CTRL+CLICK the text layer, so you load its transparency map as a selection on the yoghurt layer,CTRL+C/CTRL+V, hide the top text layer, you'll get this:
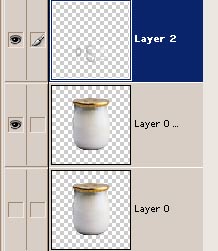
Now we have a text shaped part of the glass...double click its layer thumbnail to enter the options: we'll make a beveled text effect on the glass. Activate "bevel/emboss": I chose the settings shown:
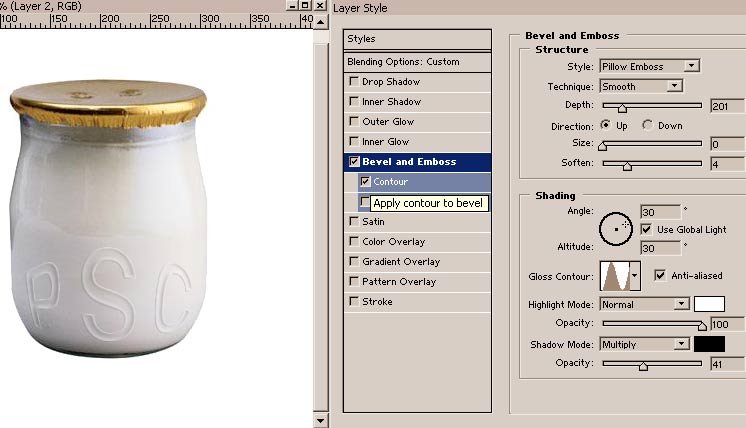
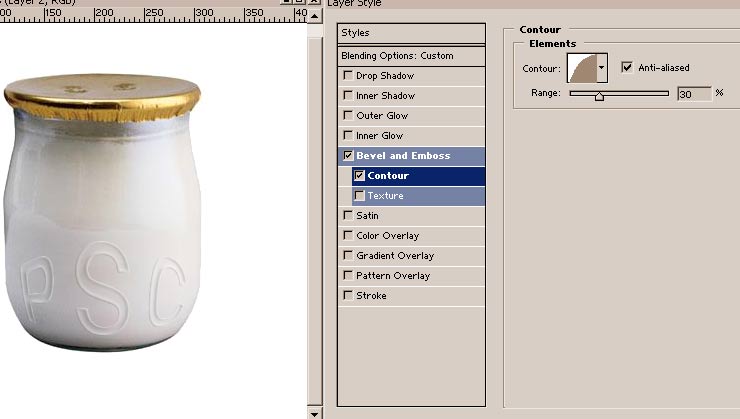
to make the bevel boss, with some thin carved edges, so the text appears like it was stamped onto the glass; the gloss contour should be irregular as glass is organic, so it replicates the kind of refelection it would produce...look at the settings and try others by yourself.I checked the contour option to make the edges look more precise.
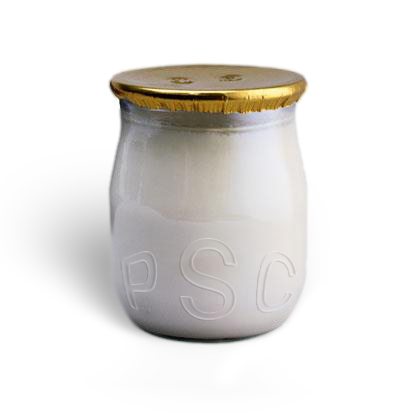
Press ENTER to validate your options, and add a 0,3 gaussian blur.AS I didn't really like the result, I lowered the layer's opacity and transformed the text again.I also scaled the effects to 10% by clicking the "f" icon on the layer and chosing scale effect.

I added a shadow, and I like it enough to say it's over.
You could also add some noise texture, just as shown on pic 8, so you try it, but the result sucks....it's just here so you try it.
Source:photoshopcontest

